Once the boards are ready to go, the next step is to sort through them and find nine that make a reasonable stack. The boards don’t have to be perfectly straight. If they are all bent in the same way, that’s fine. If the stack is a bit bowed end-to-end, we can correct that later.
When selecting boards to form a stack, it’s important that they all be as similar as possible. The broad sides should be as close to smooth as you can get them. We’ll make them perfectly smooth later, so the smoother they are at the beginning, the less waste there will be later.
Matching boards into individual stacks. #
Once you have a set of boards ready to go, lay them out on a bench in the order and orientation that you’ll be needing them during glue up.
I use 8 Pipe Clamps, each with 12” wide 2” x 2” oak cauls on each side. I will alternate these on each side of the stack as I clamp it, so I start with half of the clamps on my workbench spaced to ensure that the other half wont overlap them much. I place butcher’s paper under the clamps to protect the workbench from dripping glue.
A fine spray of clean water on the boards adds a bit of moisture, which will help the glue cure properly.
A stack ready for layup. #
I use Polyurethane glue for my stacks because it has a reasonably long working time. It will take about 15 min to actually get a single stack clamped up. I take the cap off the bottle and pour a bead of glue down the entire length of the first board. Then, I spread it with a plastic spreader the same way I spread epoxy during layup. (I use old bits of base material as a spreader here.)
It takes some practice to start to recognize how much glue to apply in a single pass. Start with too little and add more but don’t take too much time as there are seven more applications to make. Take the next board and lay it in place on top of the first one, then rinse and repeat. Once the final board is in place, you’ll have a gooey stack ready to be clamped.
Applying glue to a stack. #
Carefully push the stack over so it lays flat on the bottom set of clamps. Adjust the board placement as necessary. Note that the ends of the stack don’t have to align perfectly! It’s common to have boards of slightly different lengths and that’s okay; we’ll trim it up later.
Laying down the stack for clamping. #
Once the boards are aligned, tighten the center clamp on the bottom. Then, add top clamps on either side and tighten them. Tighten two bottom clamps on either side of those. Repeat in the same manner until you reach the ends. Try to avoid getting any glue on the cauls. You don’t want to glue your clamps to the stack. You can also take precautions by putting tape on the cauls.
Clamping the stack. #
I usually let a stack dry for three to four hours. I can make a few stacks per day.
The Woodworking Resources page has a number of articles on proper clamping. These are all worth a read and will help you understand how much pressure you should use in order to get a good glue-up.
Preparing the stack for slicing #
Once the stack is dry and out of the clamps, it needs to be prepared to be sliced. The first step is to remove all of the excess glue squeezed out during layup and clamping. This is easily done, as the polyurethane glue isn’t really structural. A Hand Scraper makes short work of it. You don’t need remove all of it, just any glue that would prevent the stack from laying flat on each side.
Scrape off excess glue #
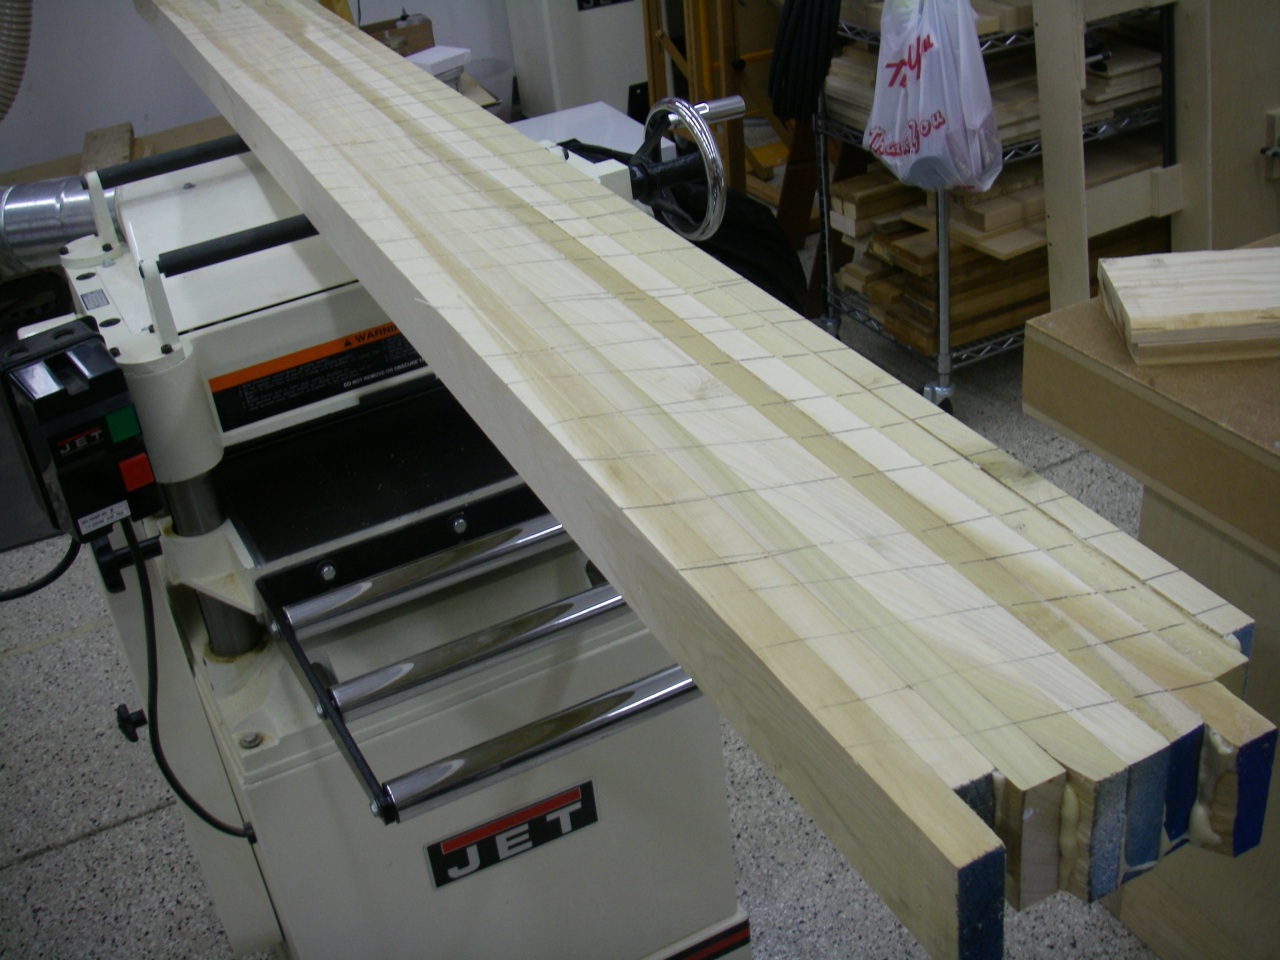
The wide sides of the stack will be uneven, since it’s almost impossible to find boards that are perfectly straight and to align them perfectly for clamping. I pick the side that looks the flattest and I run that over an 8” jointer until it is flat. I set the jointer to take off about 1/16th of an inch per pass. You want to remove the minimum amount of wood possible from now on. Pencil marks placed on the side being jointed beforehand make it easy to see which portions are smooth and where more work is needed.
First side being jointed #
Once that face is flat, I turn the stack 90 degrees and flatten the bottom of the stack. To do this, I place the newly flat face against the fence of the jointer. Now we have one flat wide face, one flat adjacent base and those two surfaces are at 90 degrees to each other.
Second side being jointed perpendicular to the first side #
Next, I flatten the other wide face by running the stack thru a planer with the jointed side down. This yields a stack which has two good sides, and one good base. Surfacing the fourth face is optional at this point and I usually skip it. Then, I take the stack over to my chop saw and trim the ragged ends square, if necessary.
Third side being planed parallel to the first #
The stack is now ready for slicing.
Cleaned up stack ready for slicing #
Sometimes there are blemishes in the wood (knots, etc.) or uneven boards near the ends of a stack. That can be okay, as long as these blemishes are beyond the ends of any reasonable core you will build. Stacks are often longer than actual cores.